Step 1
Config the PowerServer Profile in the PowerBuilder IDE.
Create the PowerServer Profile and follow the instructions to make the whole application ready for deployment.


Step 2
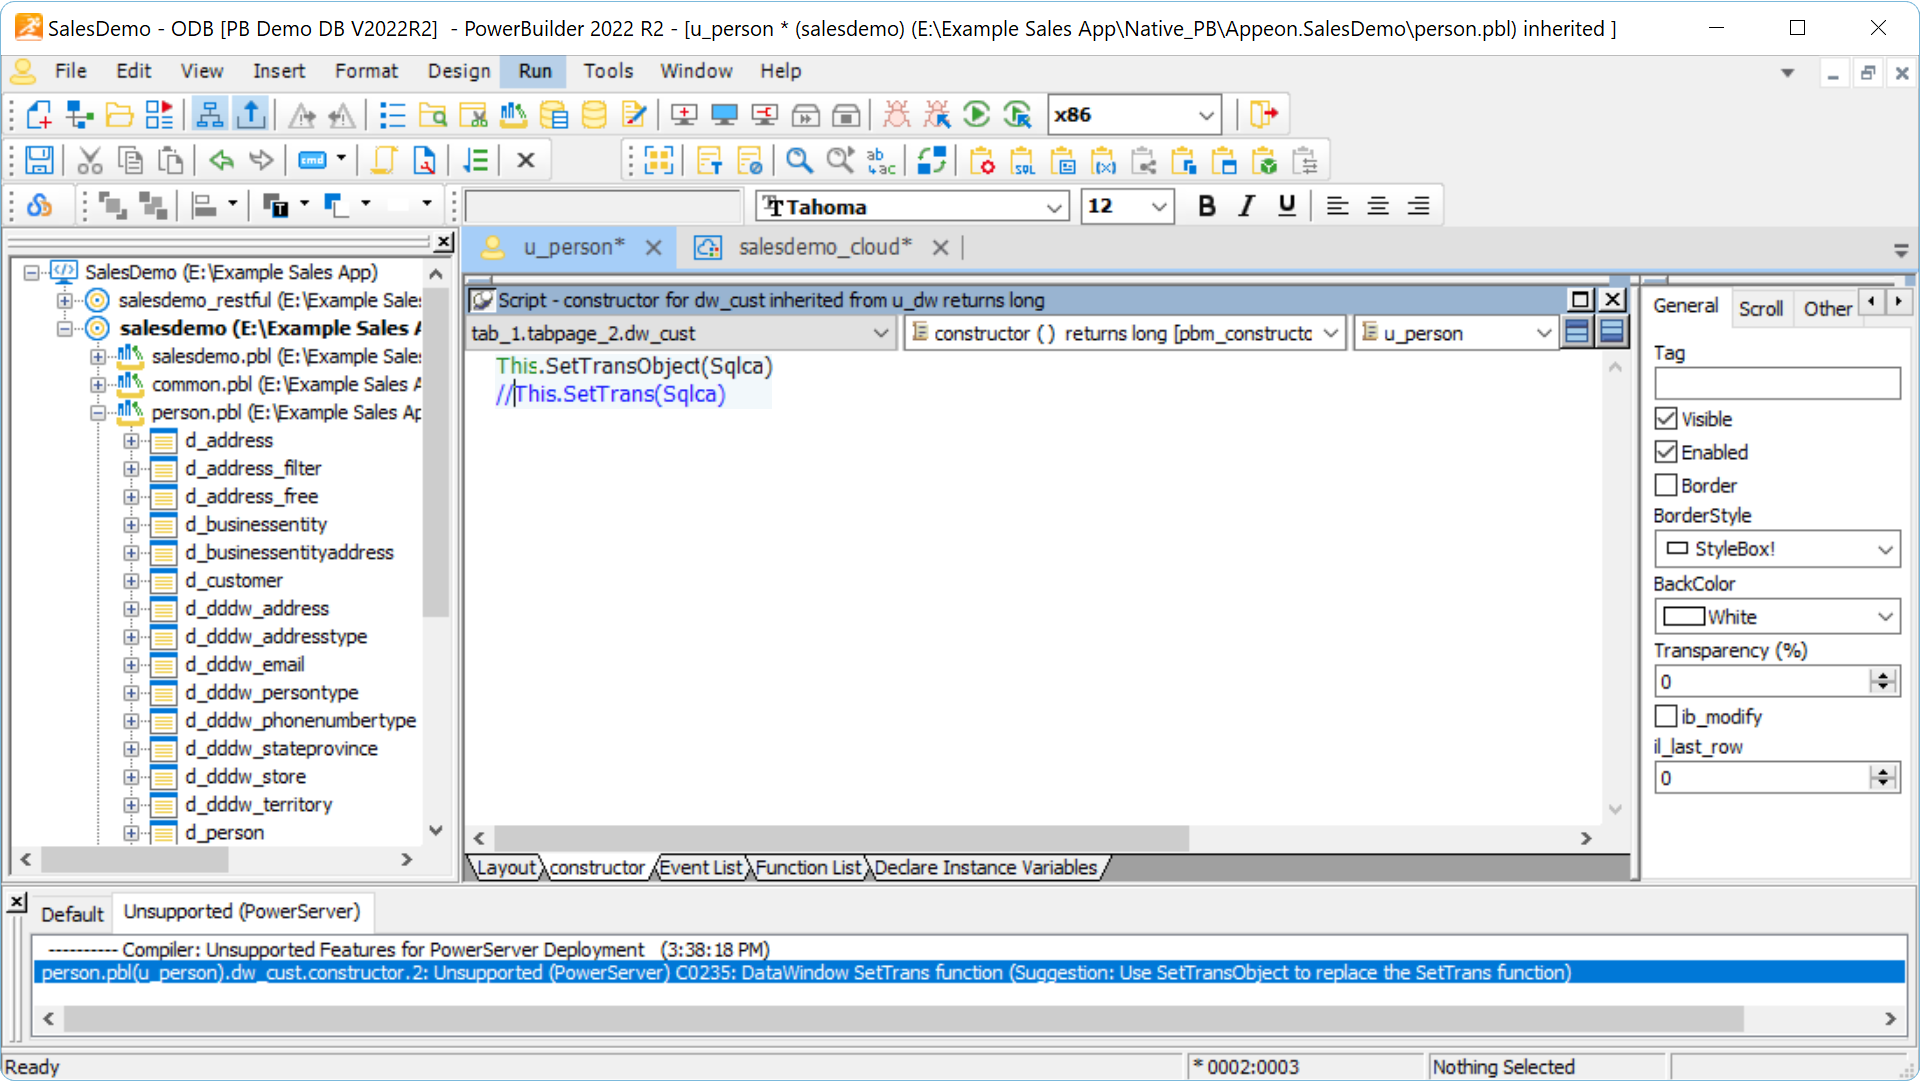
Remediate unsupported features & discrepancies, if any.
Only a handful of unsupported features and discrepancies. Use the built-in tools to identify these issues and remediate by removing or working around them.
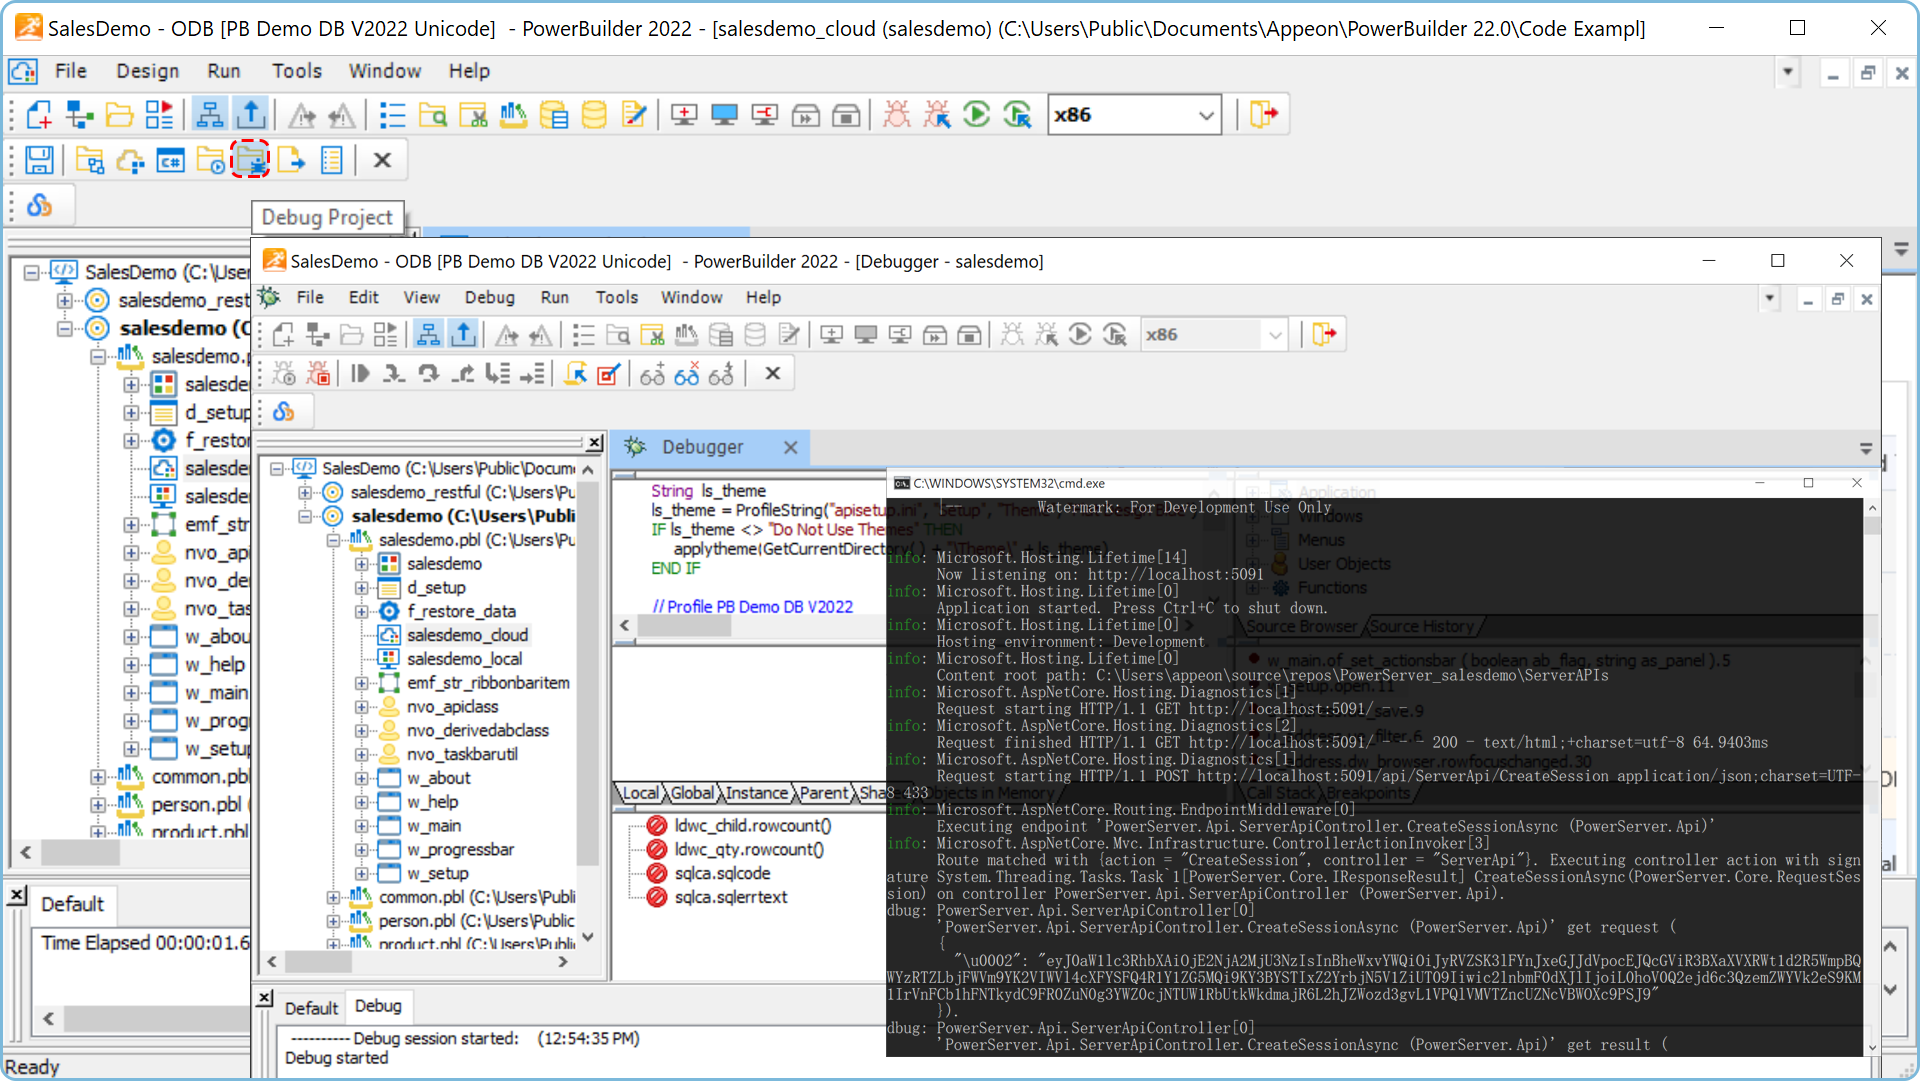
Step 3
Build & test the app in the development environment.
Properly test your app with various tools and deploy it to your development environment.
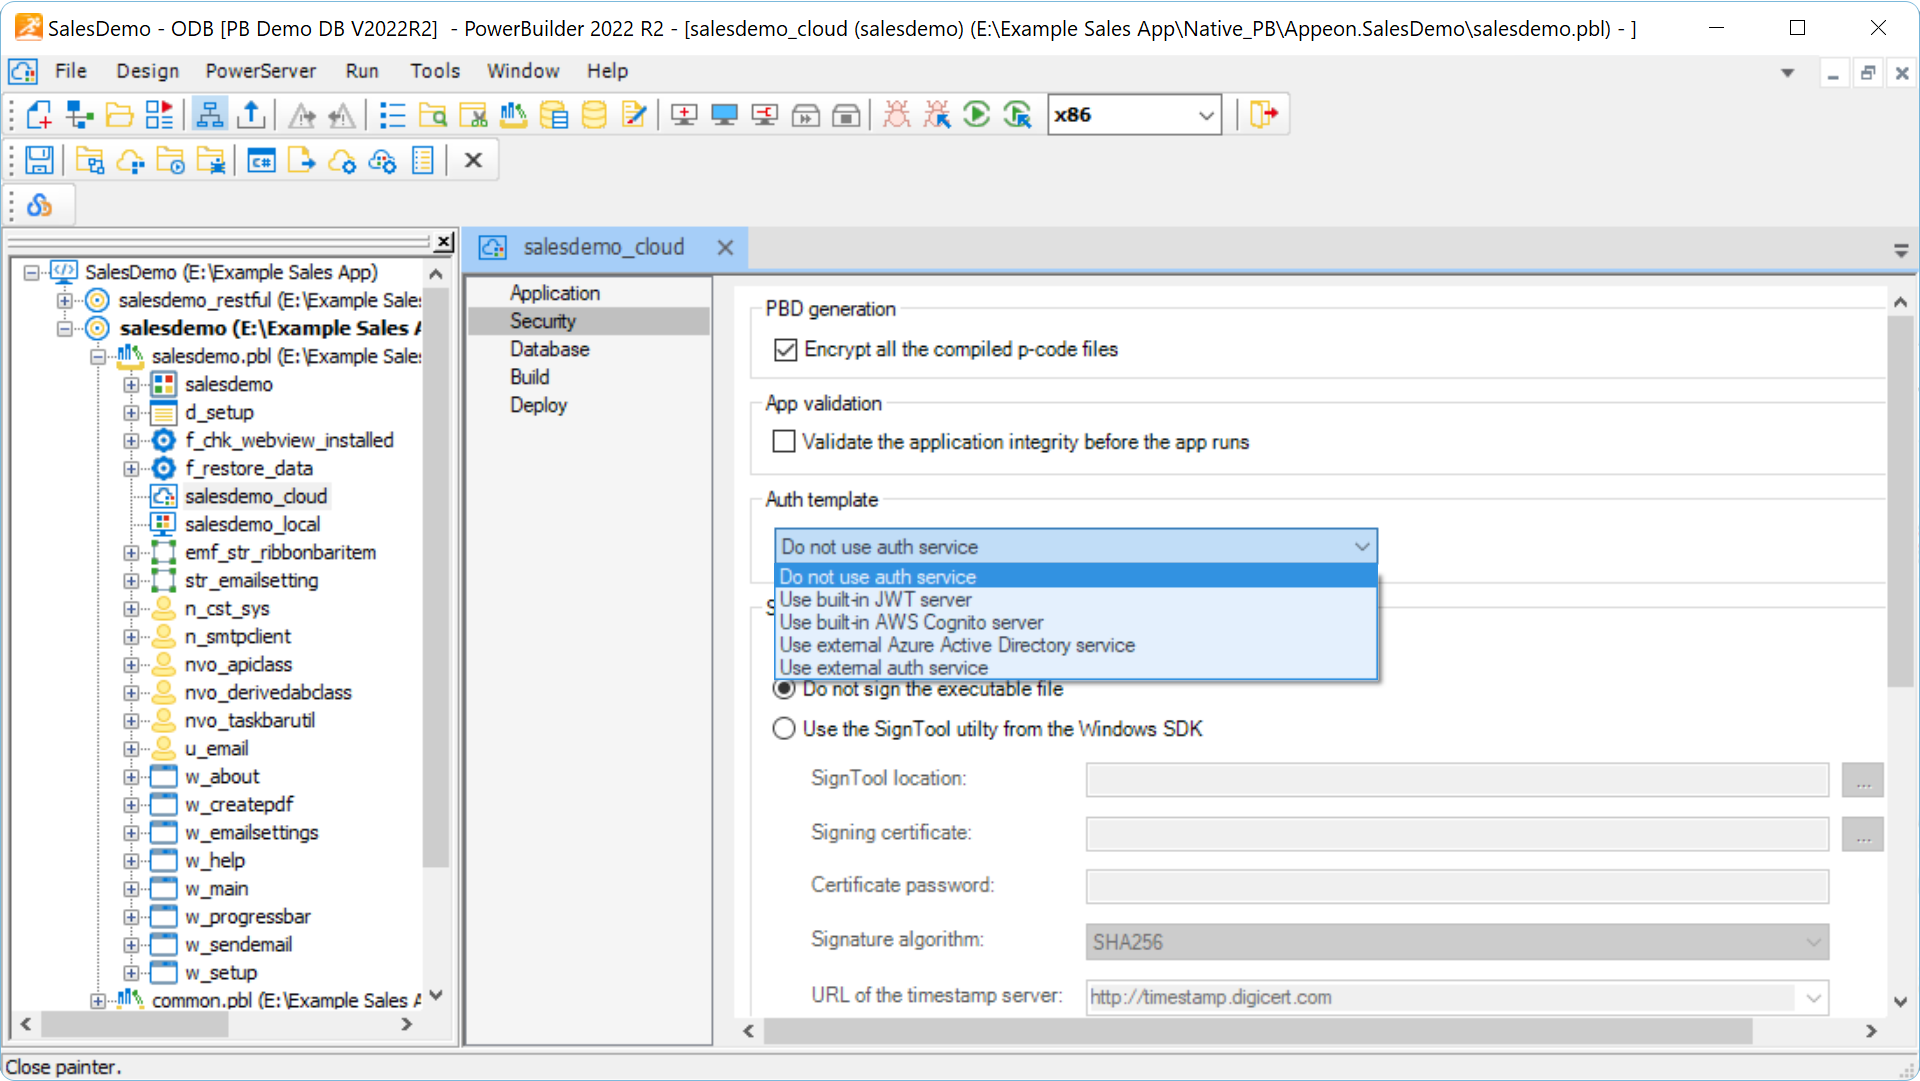
Step 4
Secure both your client apps and REST APIs with the built-in or external services.
The client apps can be automatically encrypted. Use the built-in JWT services to secure your REST APIs. External auth services, such as Amazon Cognito service, and Azure Active Directory are also supported.
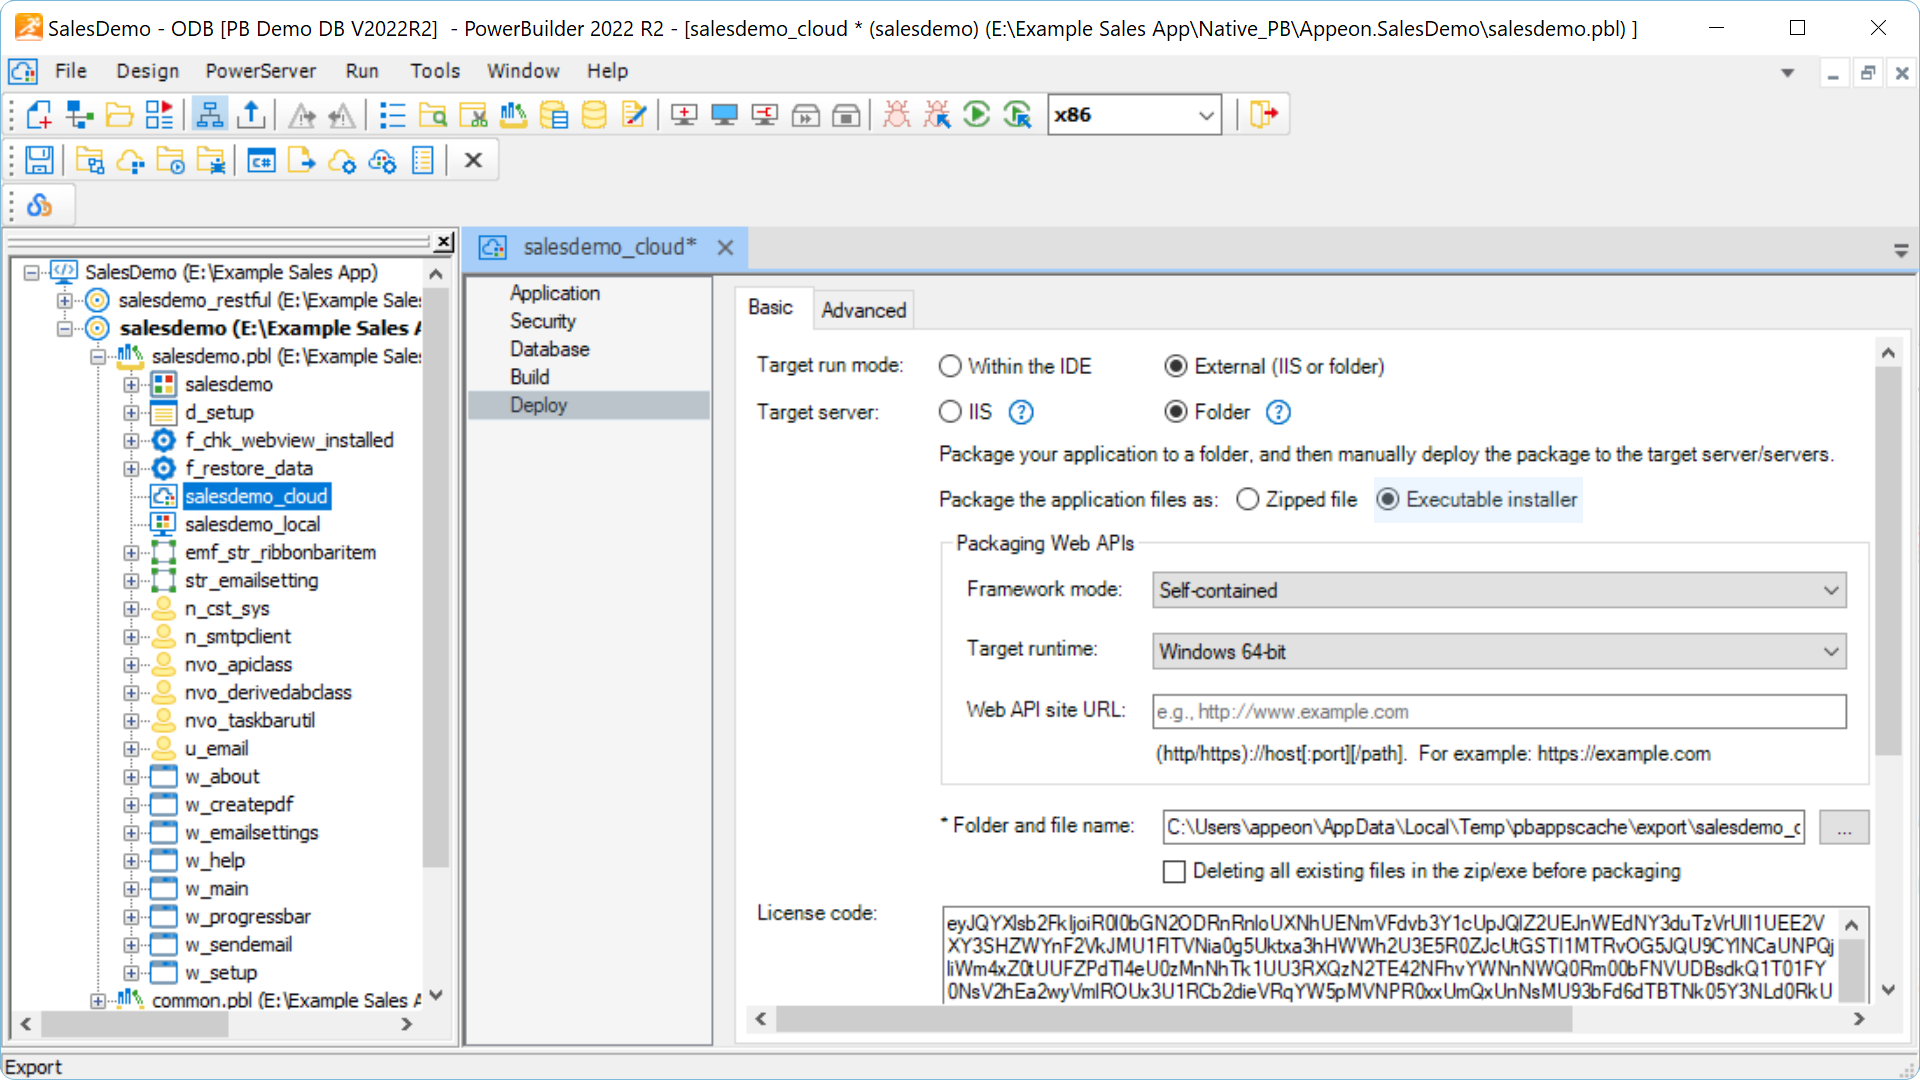
Step 5
Deploy the tested and secured app to the production environment.
Choose from a variety of deployment options that can accommodate virtually any process, no matter you self-host or use managed services.